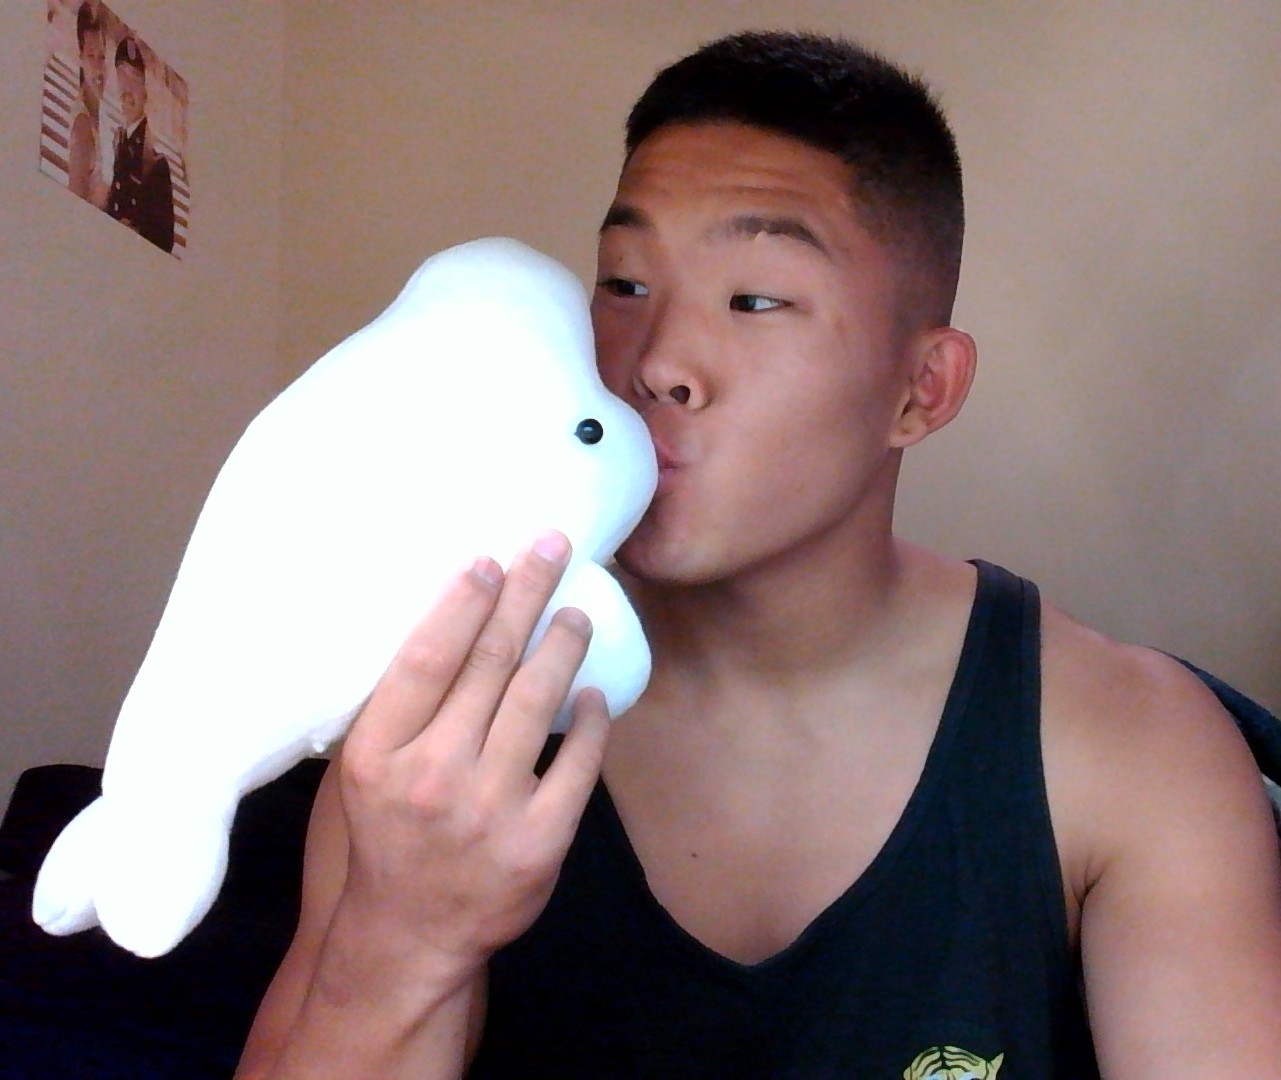
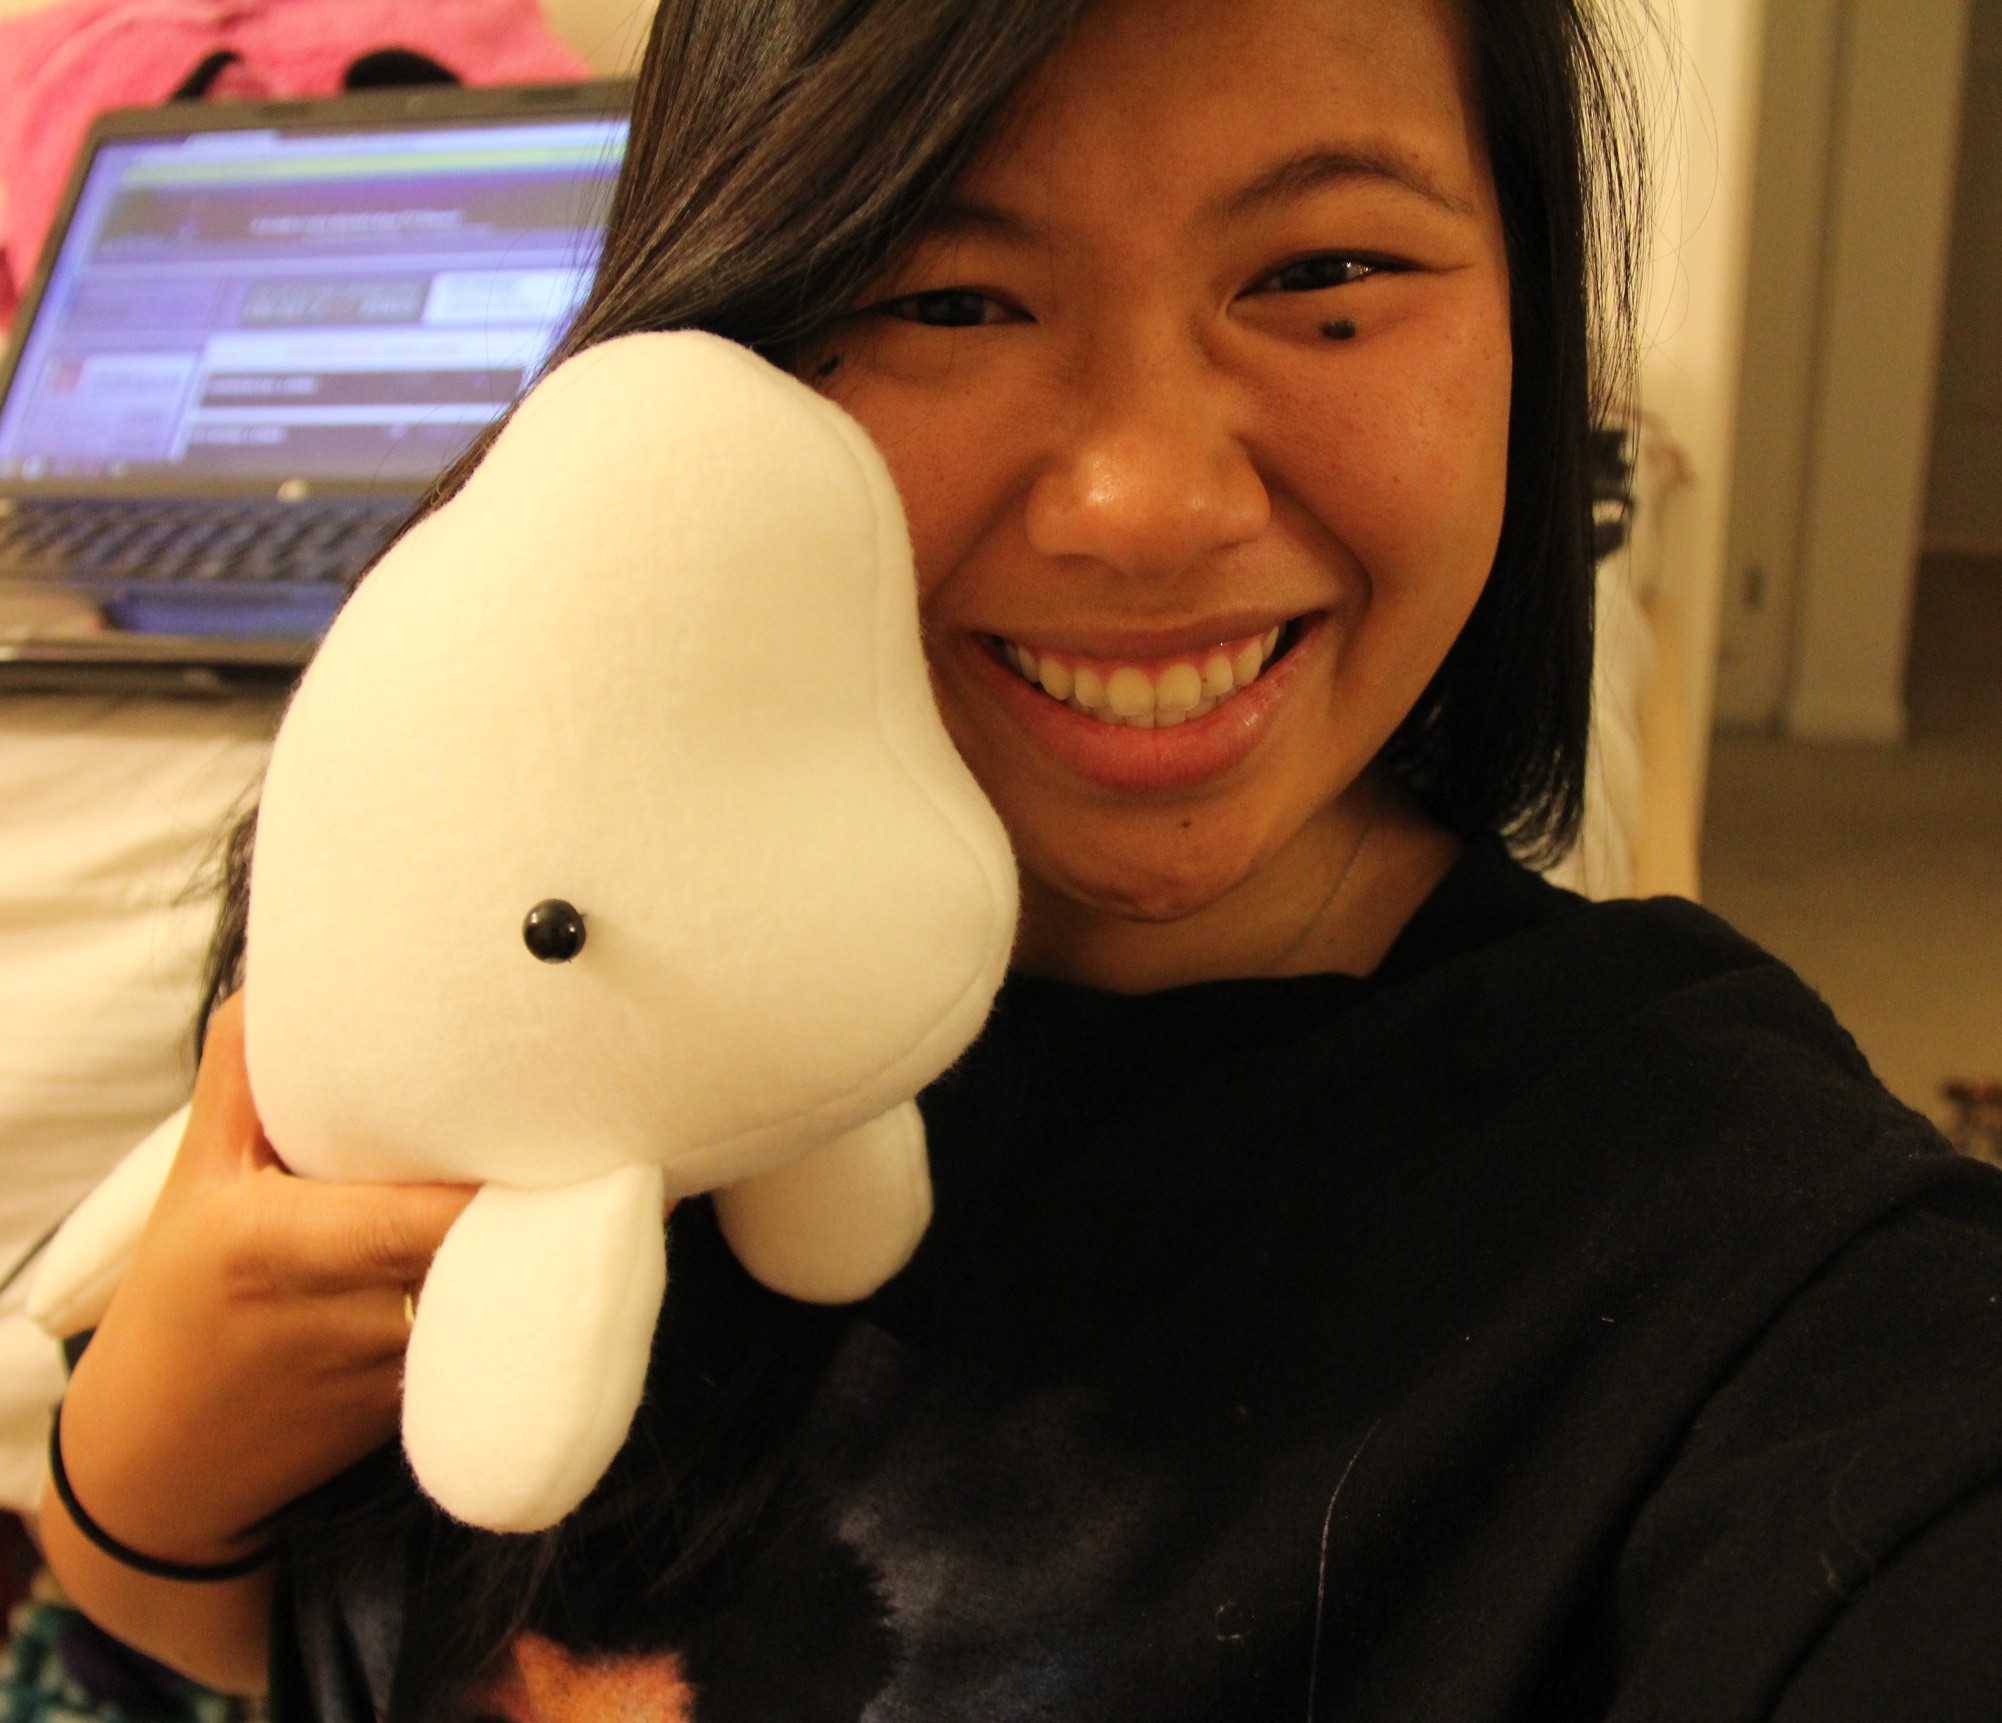
Happy, happy, happiest 18 months with my favorite person of all time – Matthew!!! It’s been a wild and crazy ride up to this point, but I wouldn’t trade it for anything else. Whether it’s journeying across America, foodie explorations, movie marathons, satisfying our need for the extreme, learning the complexities of communication, or pushing each other to run towards the eternal reward, there has never been a dull moment 🙂 Long distance sure is the pits but God has been so good and faithful to us that this celebration really goes out to our great Abba Father.
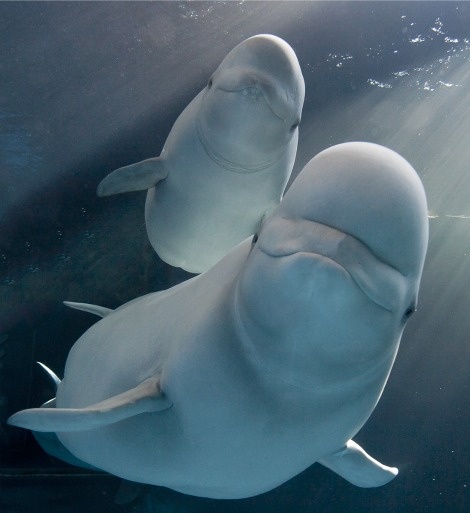
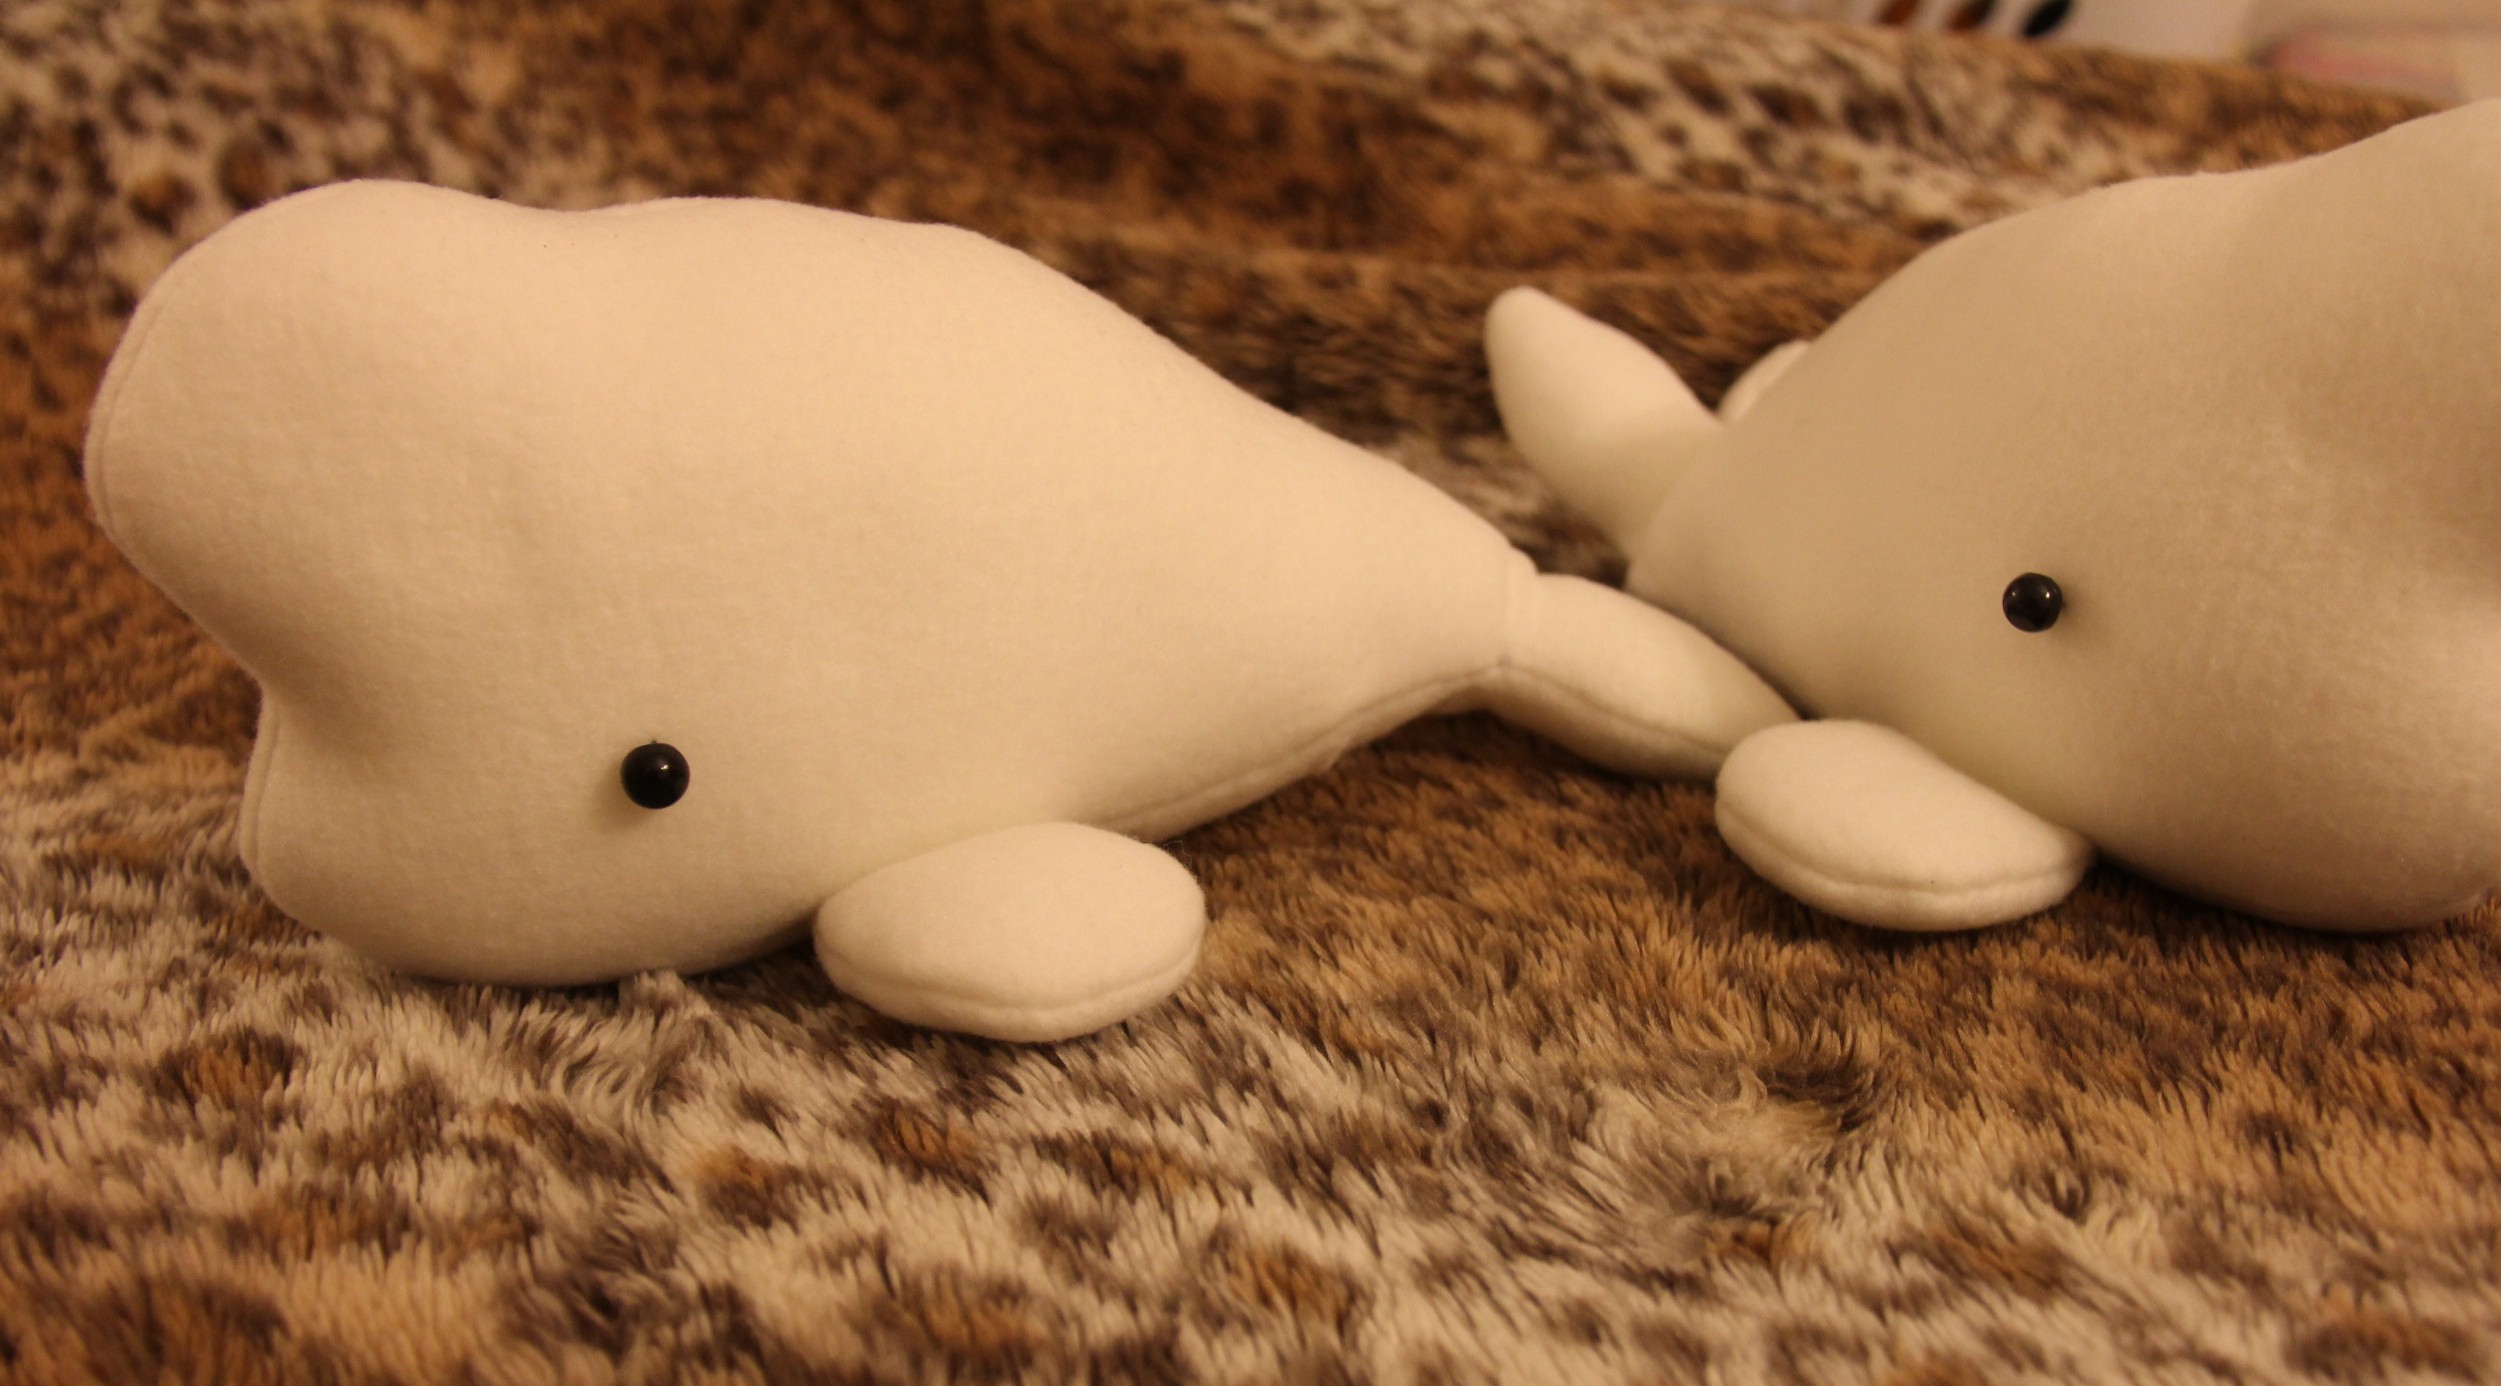
I’ve been wanting to make something crafty for my main man for awhile and I figured this would be a good a time as any. Belugas are kinda our favorite animal cuz come on – LOOK AT THEM.

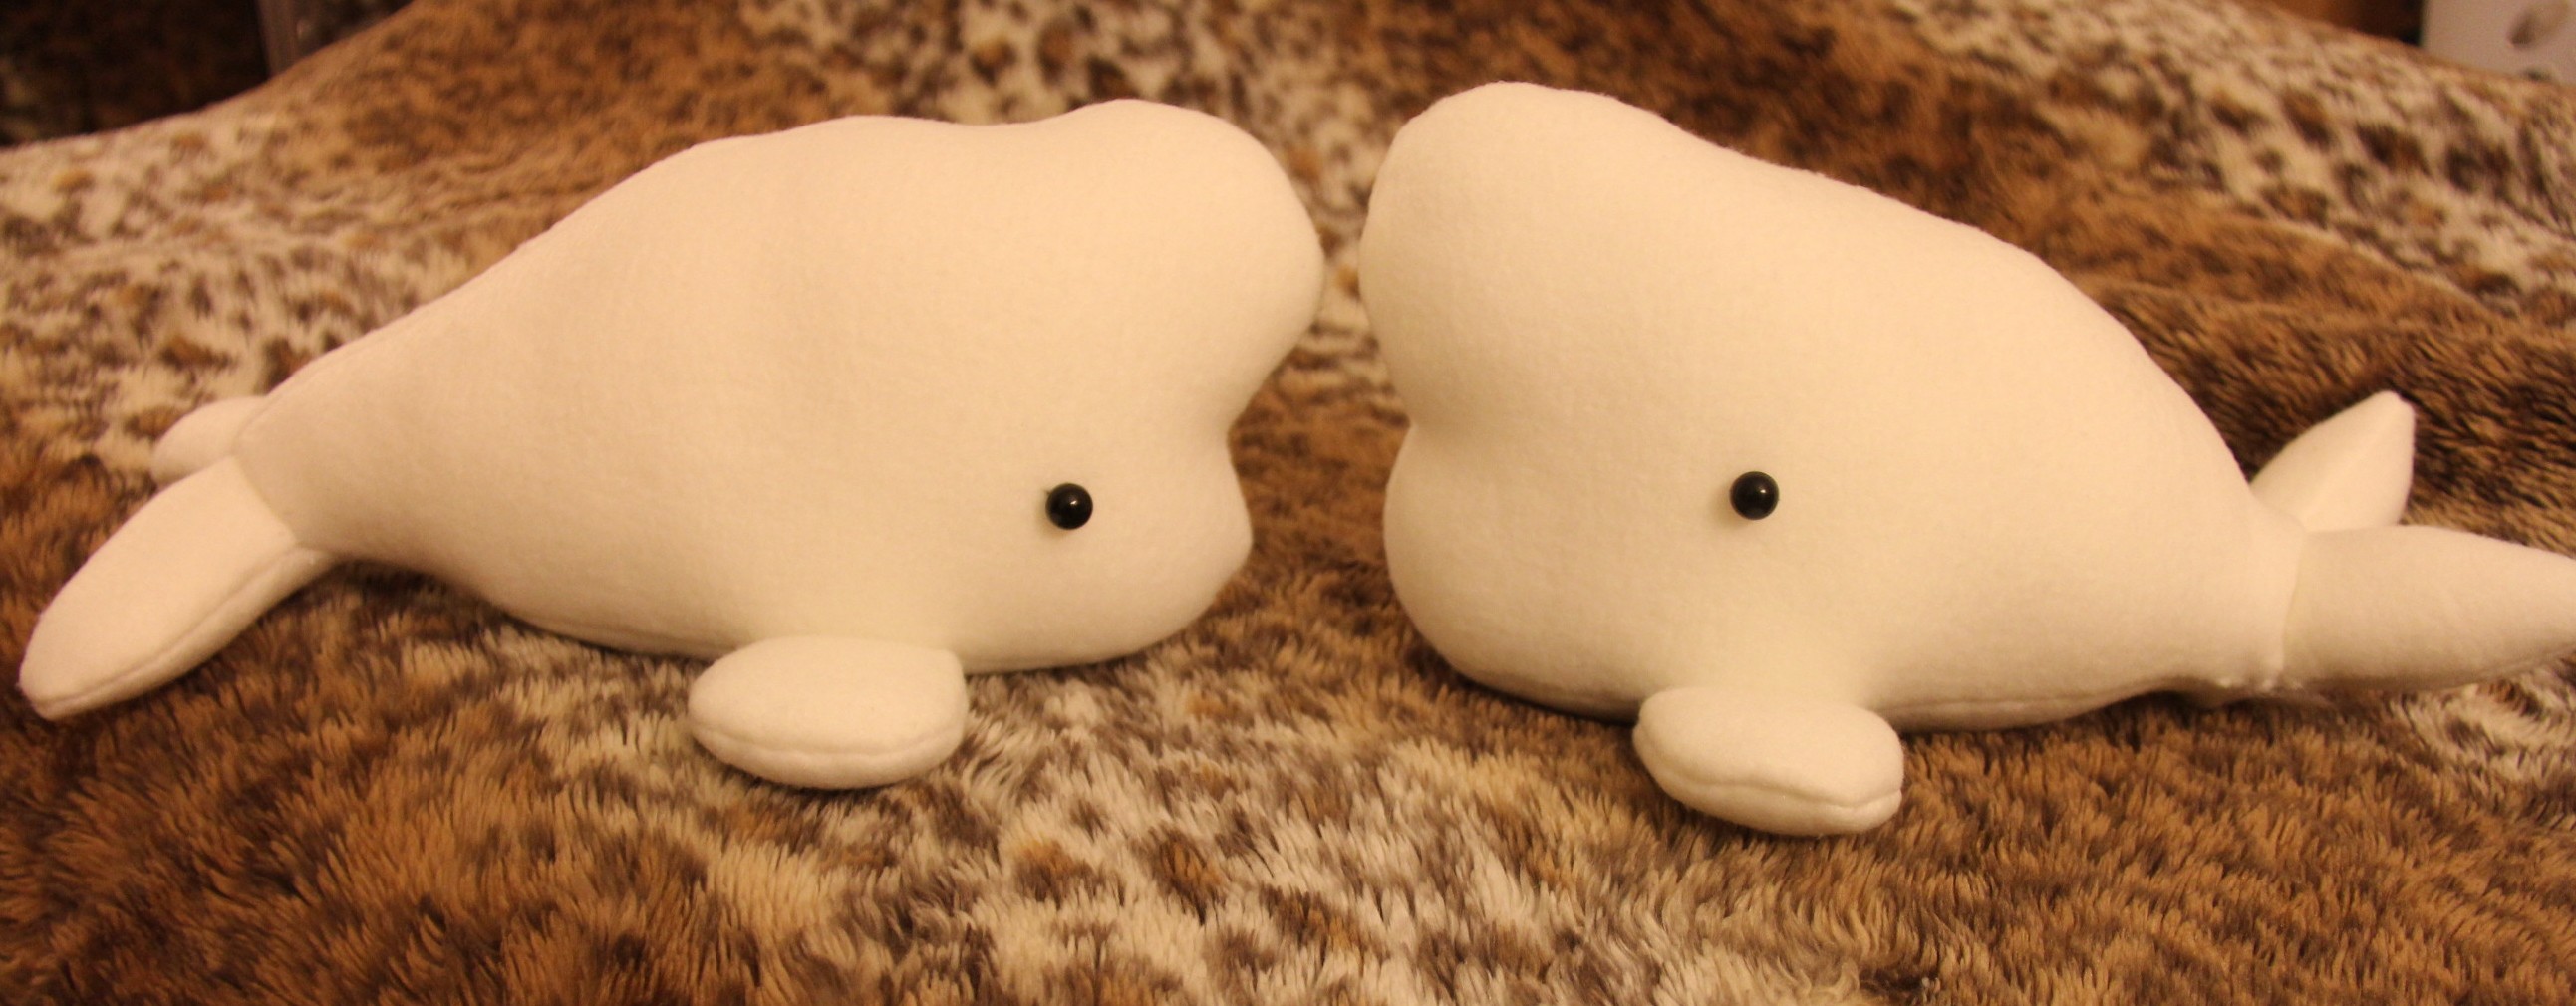
And so I decided to make my own His-And-Hers baby beluga stuffed animals! This was sort of a trial-and-error process after some hefty research on how to make stuffed animals. I am by no means an expert at sewing or working with fabric so if I can do it, so can you!! You can definitely make your own changes or adjustments to the patterns so that it’s a shape you are more fond of. OH and you can also make whales with these steps, too! Alrighty then, here we go!
You’ll need a couple things before you get started:
- Felt or any other soft fabric (White for belugas, Grey/Blue prints for whales)
- Two Black Round Beads
- Plush Fiber Filling (for stuffing)
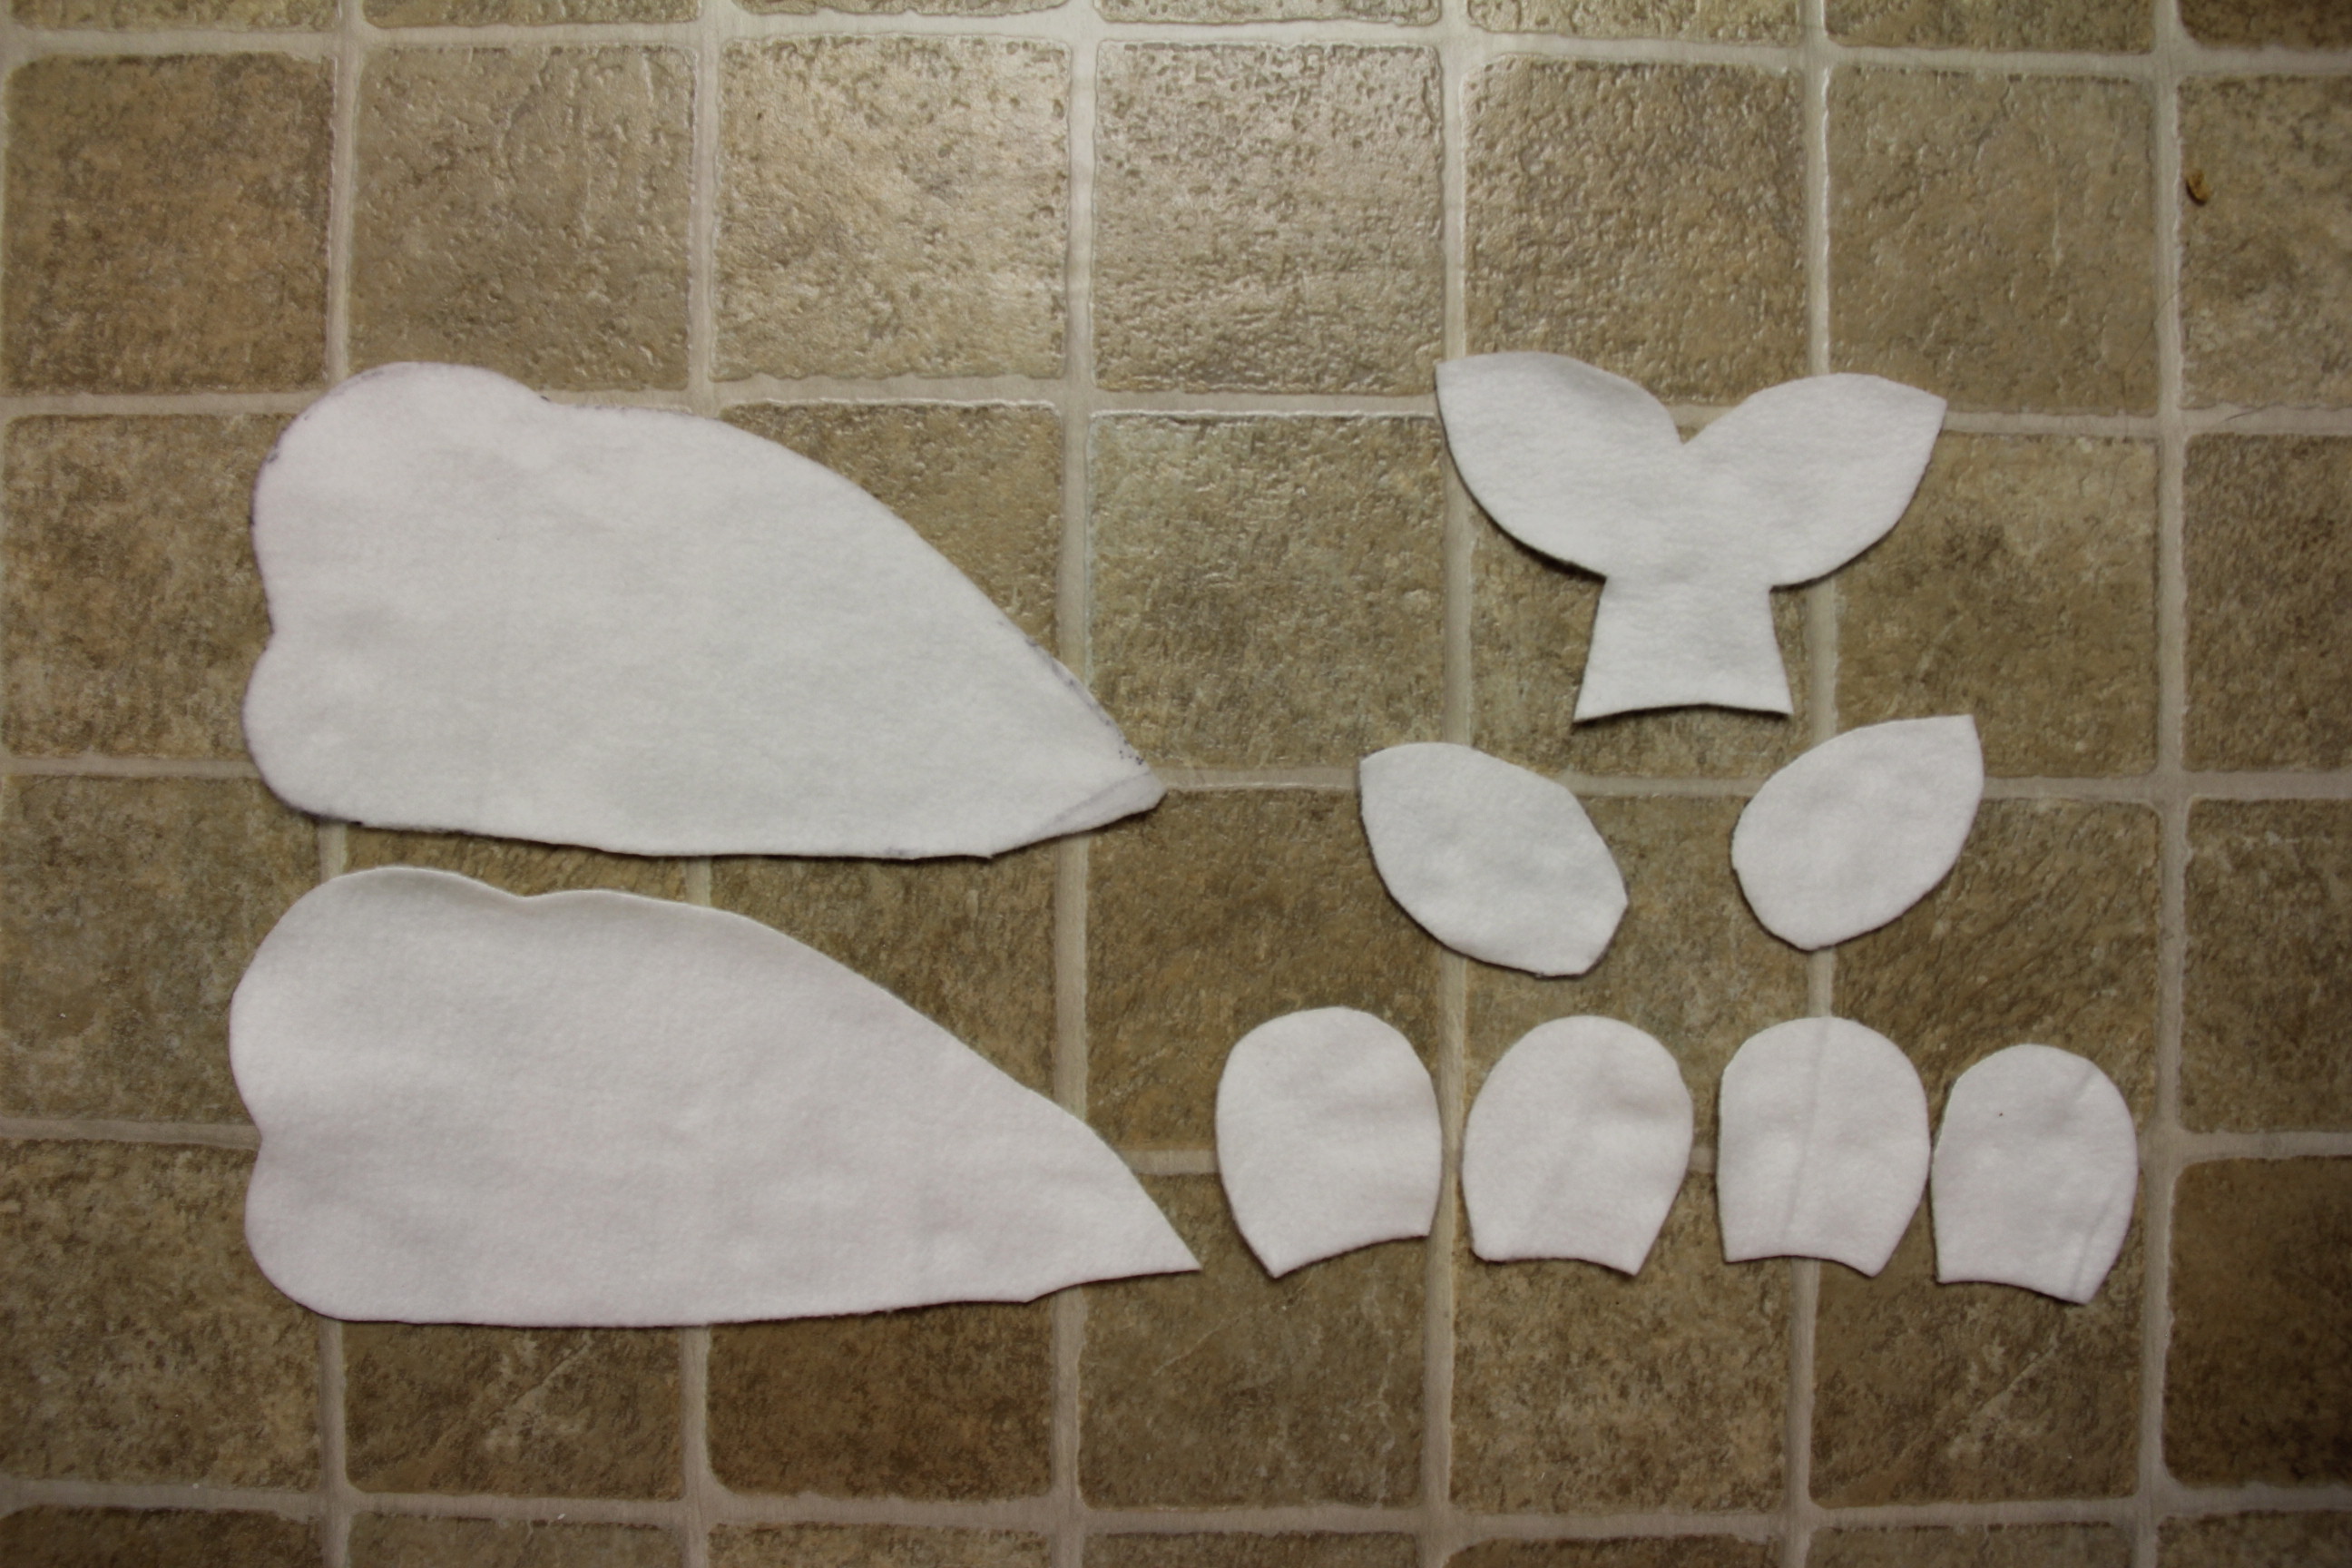
STEP ONE: Cut out all your fabric pieces. You will need to cut out:
- TWO Body Pieces
- FOUR Fin Pieces
- ONE Complete Tail Piece
- TWO Individual Tail Fin Pieces
- ONE Bottom Belly Piece (not pictured)
Make sure to include at least a half inch more fabric than the intended size of your stuffed animal to allow room for the seam. NOTE: In order to make the tail a little longer, you will want to cut the end of the body piece to slightly longer than the body size and cut it at a slanted angle. Reference the photo below.
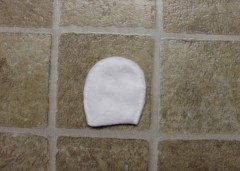
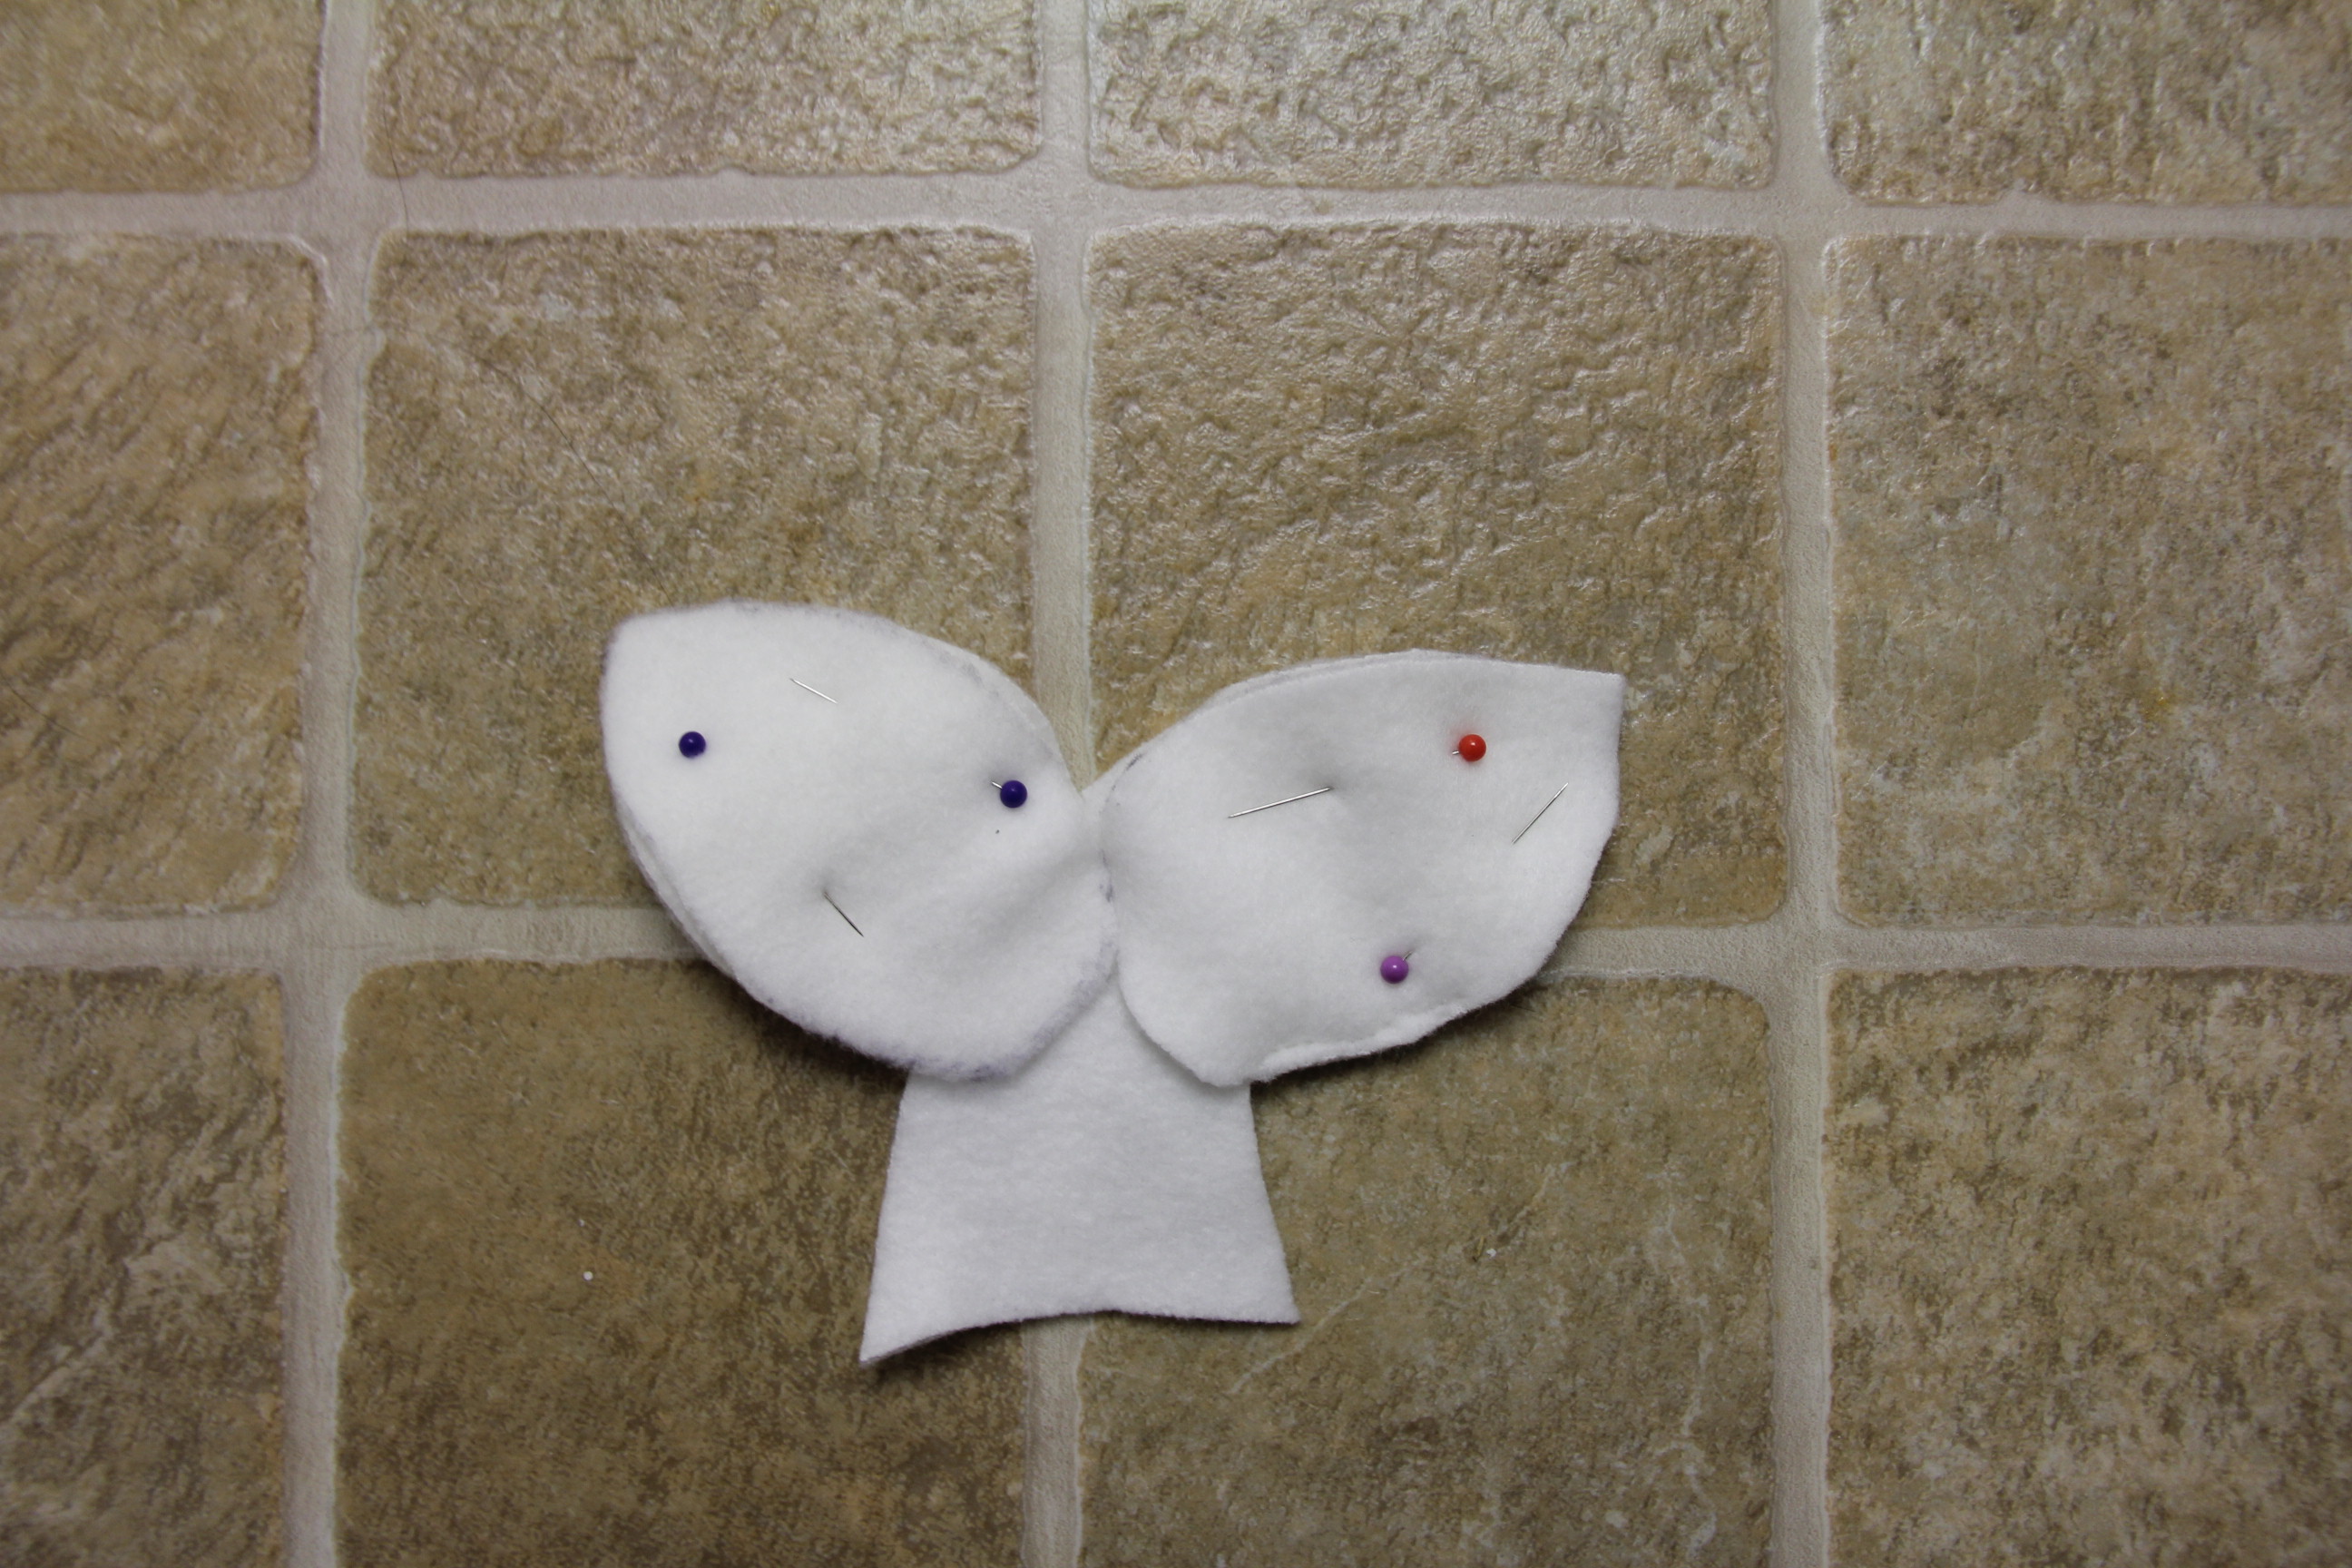
STEP TWO: Sew together two of the fin pieces to make one fin. Repeat with the second set of fins. Once you’re finished, flip each one inside out and gently stuff them with filling (Right picture is once its flipped).

STEP THREE: Sew the fin onto the outer side of the body piece, about a third to half of the way back from the head. It’s important that you sew it to the outer side so that it pops out once you flip everything inside out. Repeat with the other fin on the second body piece.
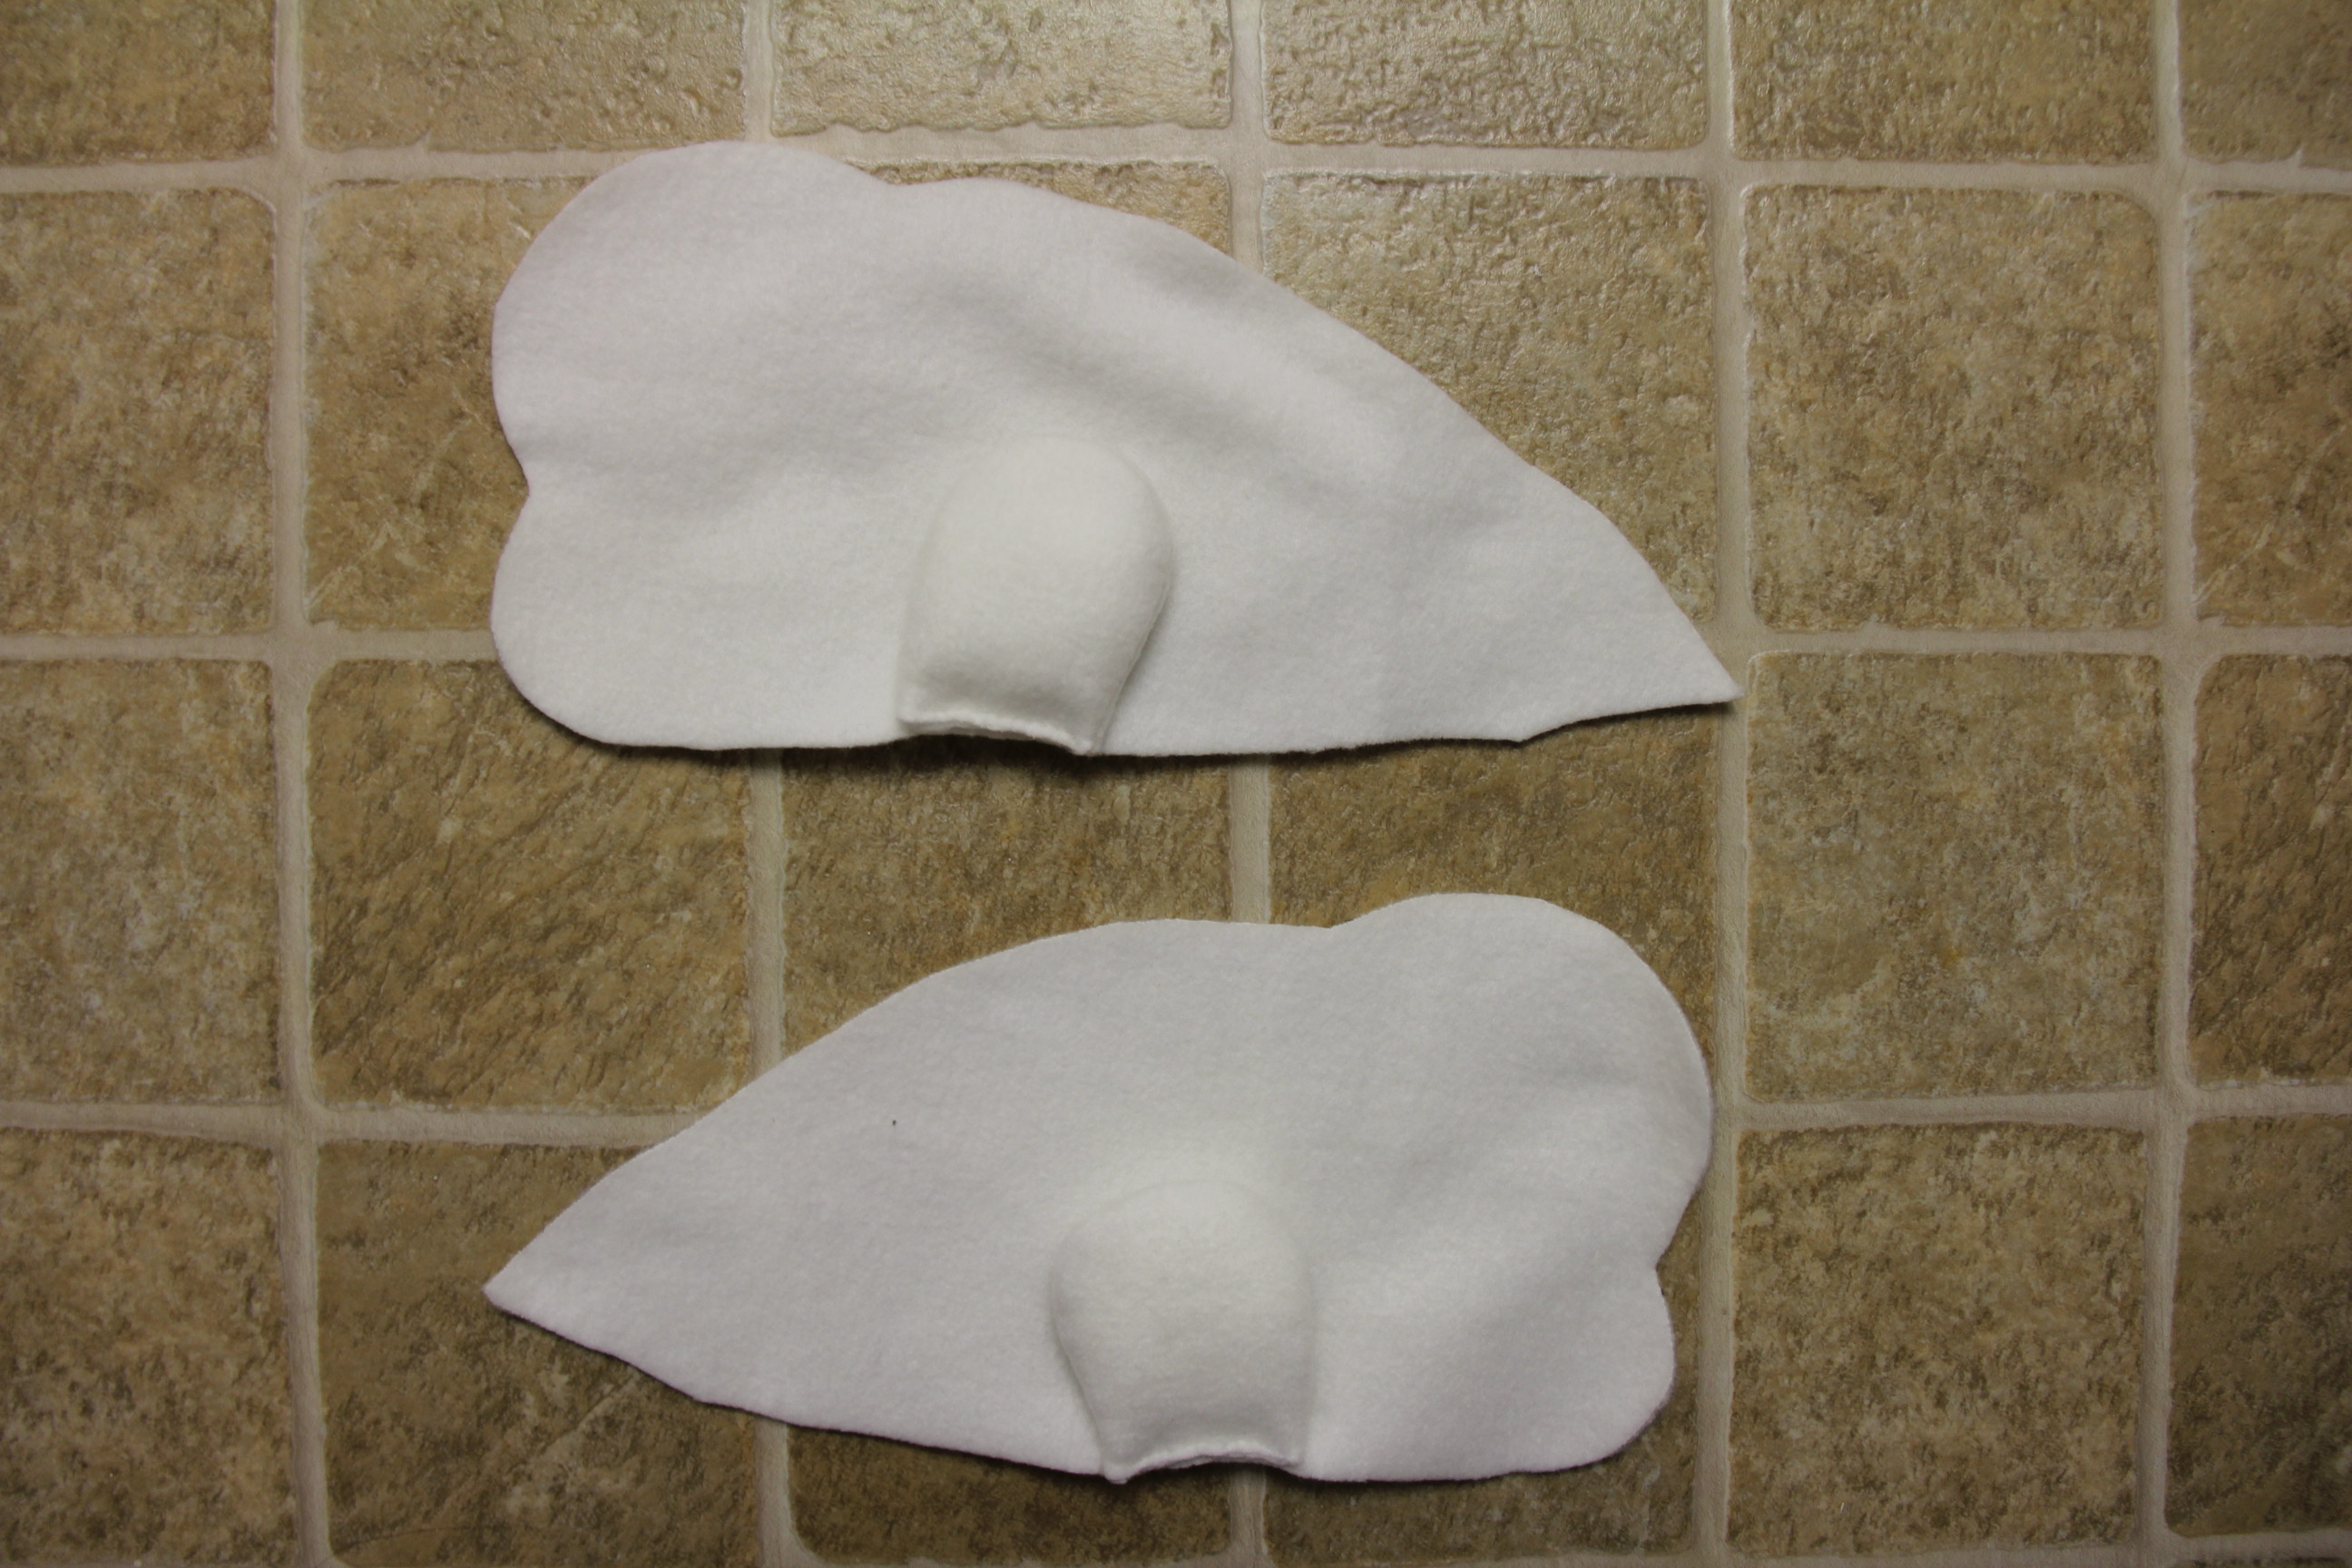

STEP FOUR: Sew the black beads – aka the eyes- onto the outer side of the body pieces. It’s important that you do this before you sew the rest of the body together.

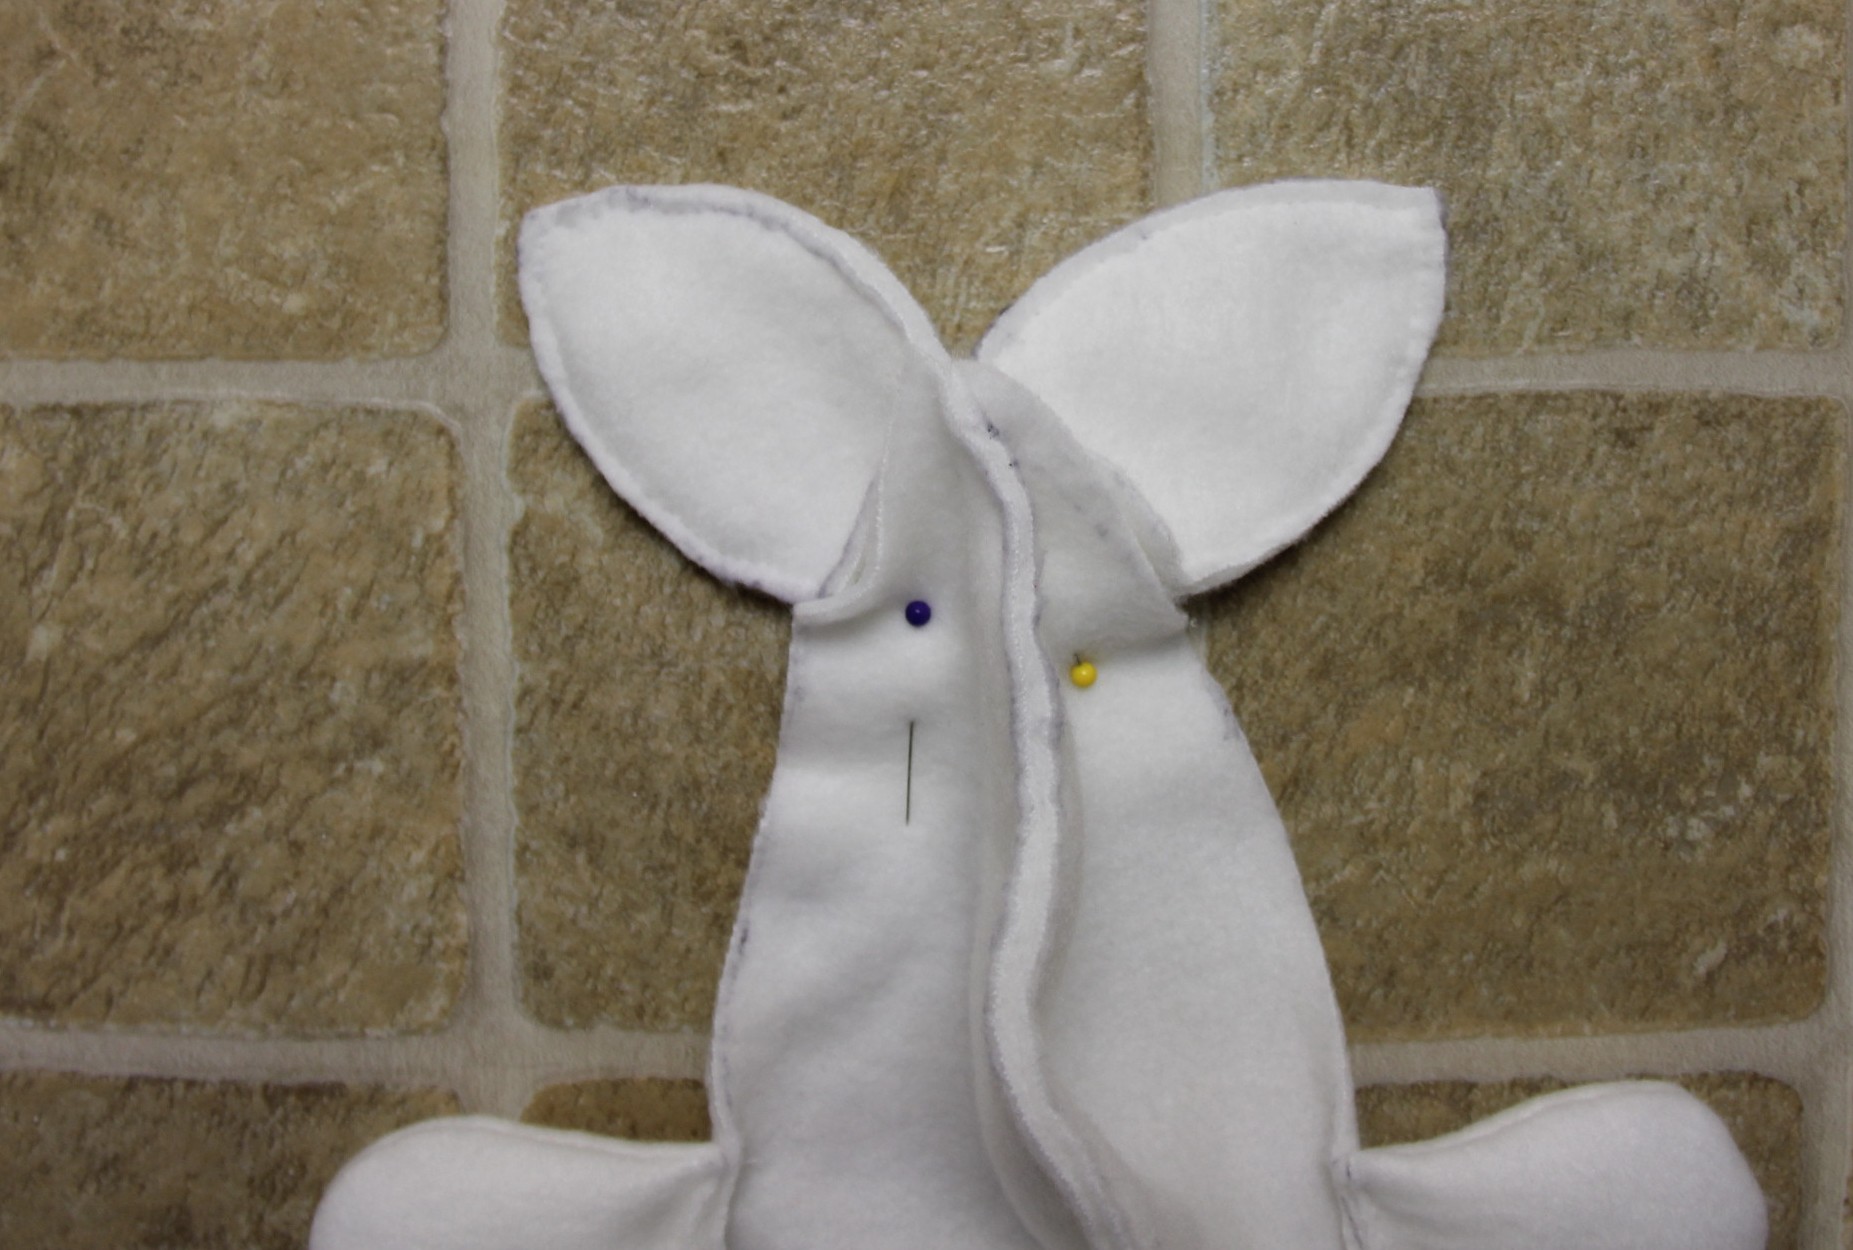
STEP FIVE: Sew together the two body pieces with the fins on the inside. Only sew together the top half down to the bottom of the face and make sure the bottom stays open to sew on the belly piece later.

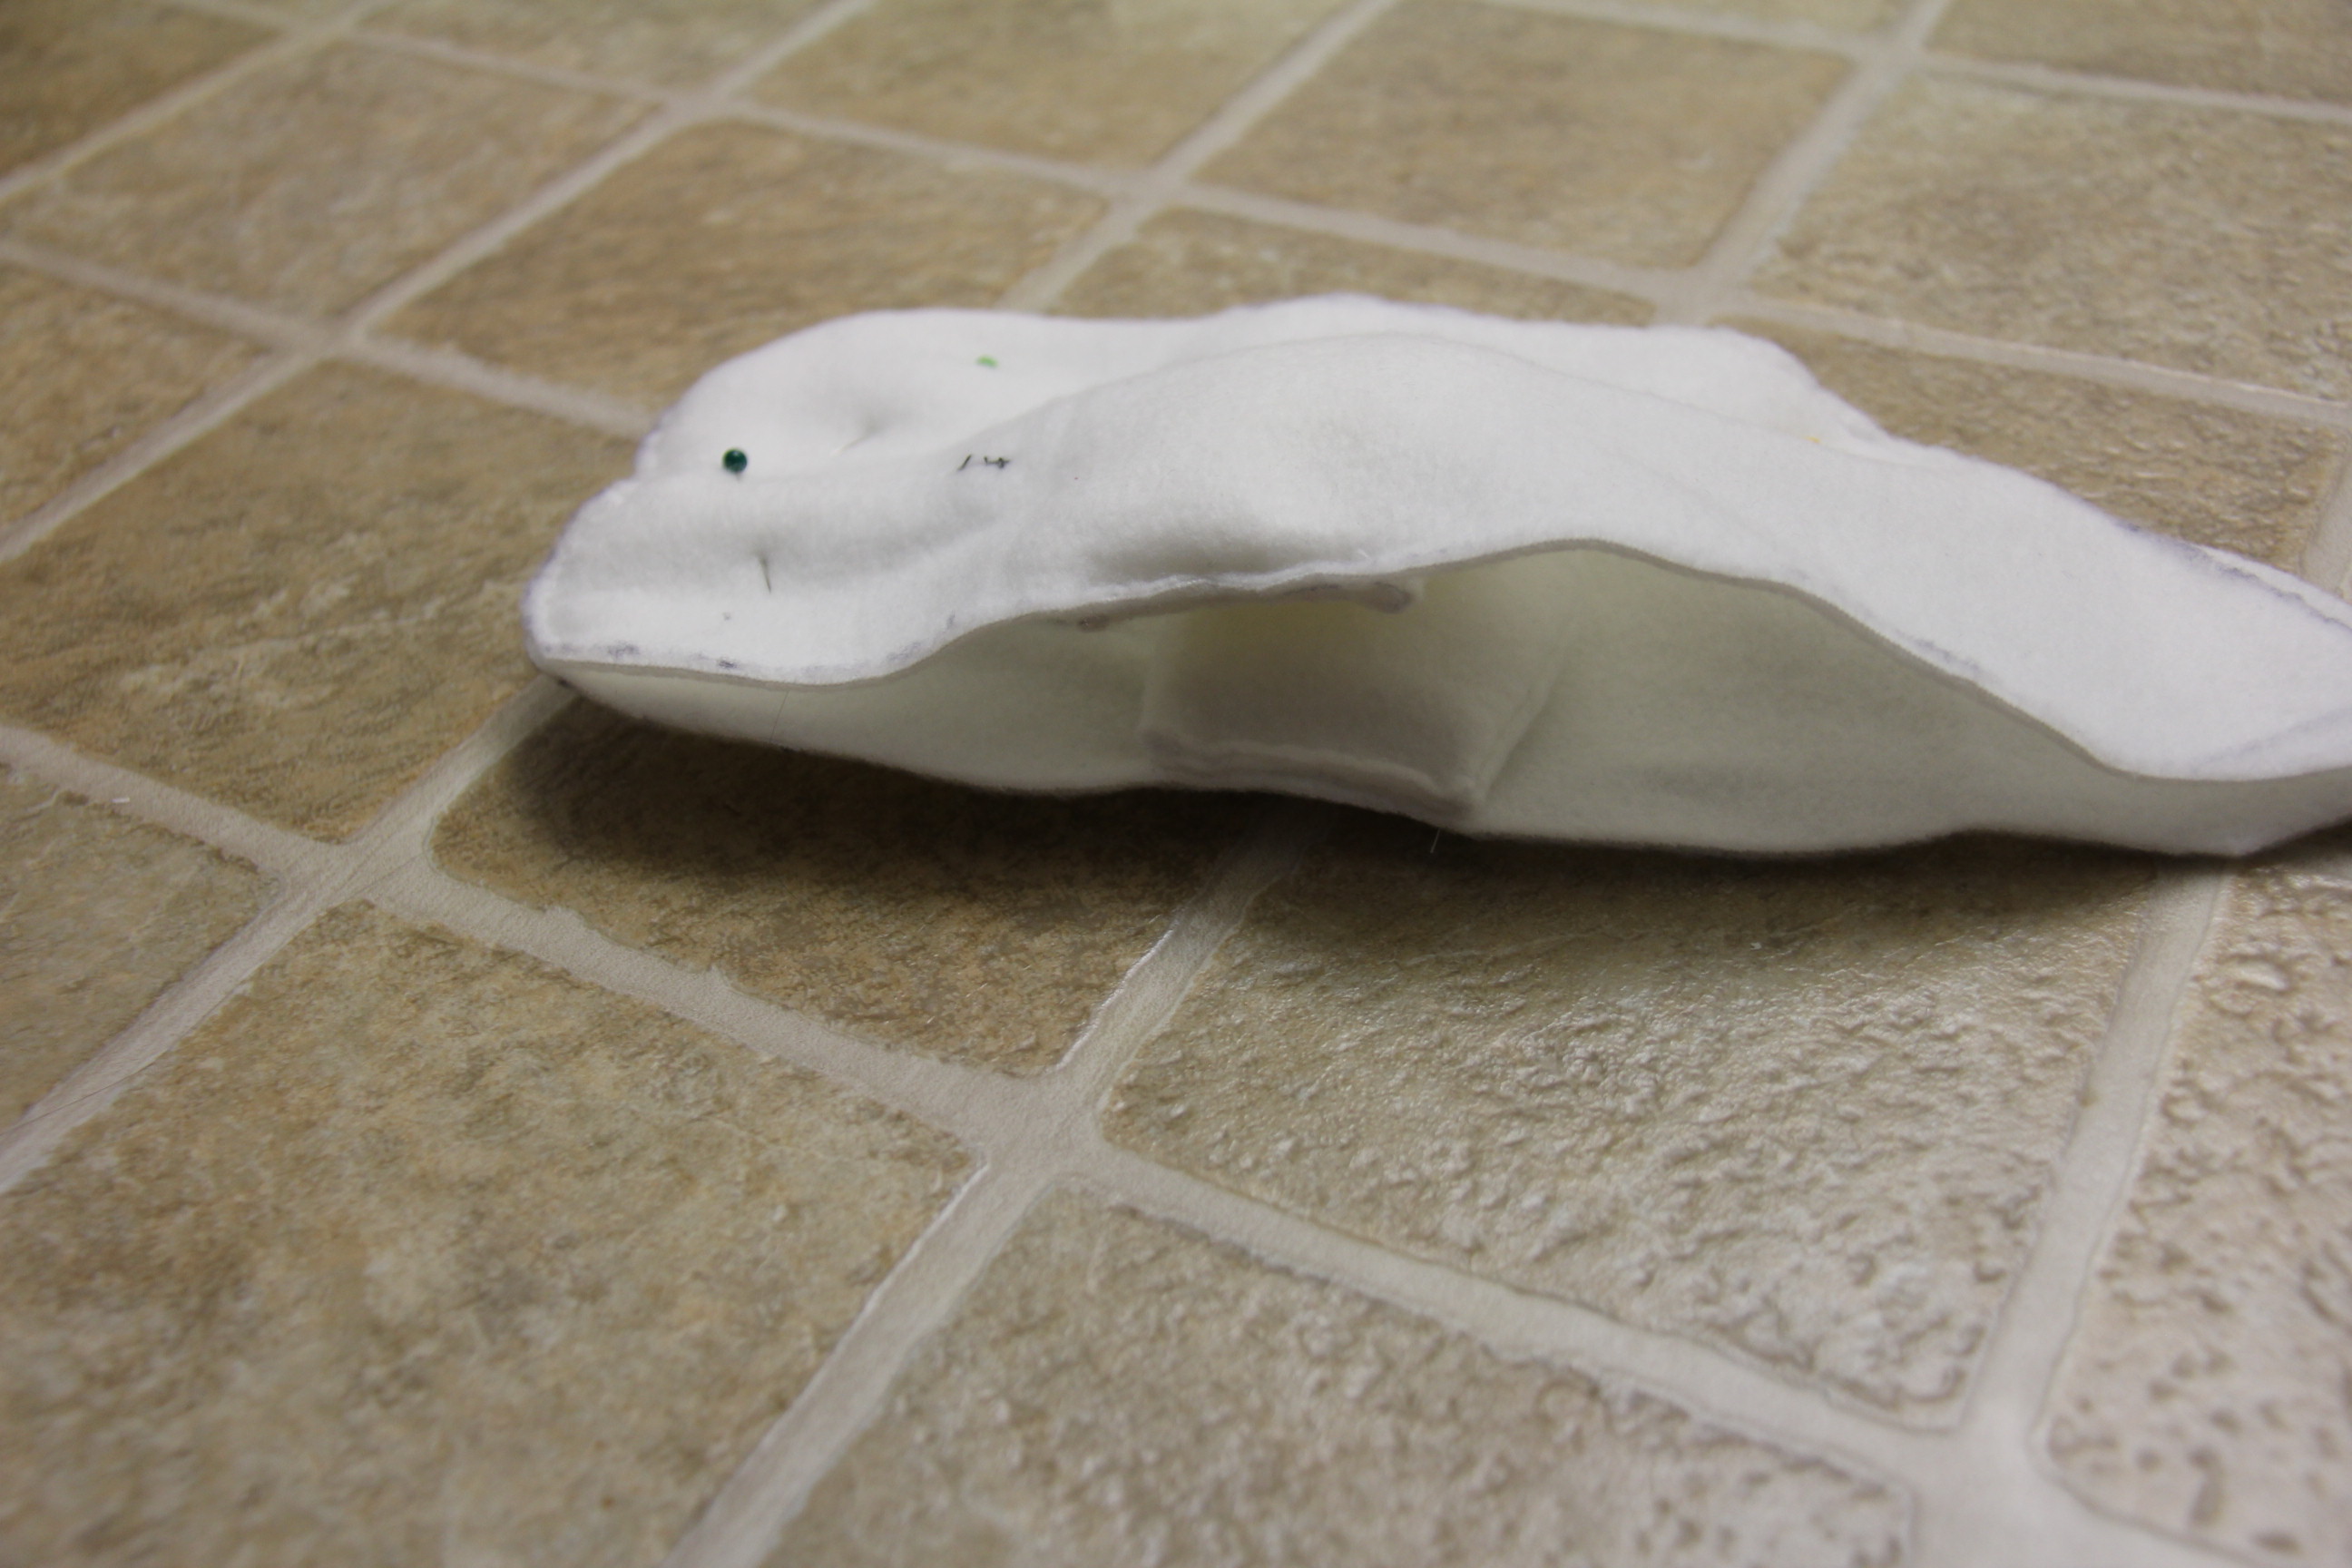
STEP SIX: Take the complete tail piece and align the two individual tail pieces on top. Sew together the pieces together, leaving the inside flaps open because those pieces will be sewn onto the body piece.
STEP SEVEN: Take the tail pieces and line up the inner flaps against the tail end of the body pieces, making sure that you’re sewing it with both inner side on the outside so that you don’t see the seams when you flip everything inside out. That’s kinda confusing haha just look at the picture.
STEP EIGHT: You’re almost there! This is usually when I trace out the belly piece, lining it up against the body pieces to see how long the piece should be and adjusting for how wide it should be, depending on how fat you want it to look. Then, sew the belly piece to the bottom of the stuffed animal BUT NOT ALL THE WAY. You want to keep the side that meets the tail piece open! If you’re making a whale instead, try using a different print to spice things up!
With everything sewn, it should look something like this now.
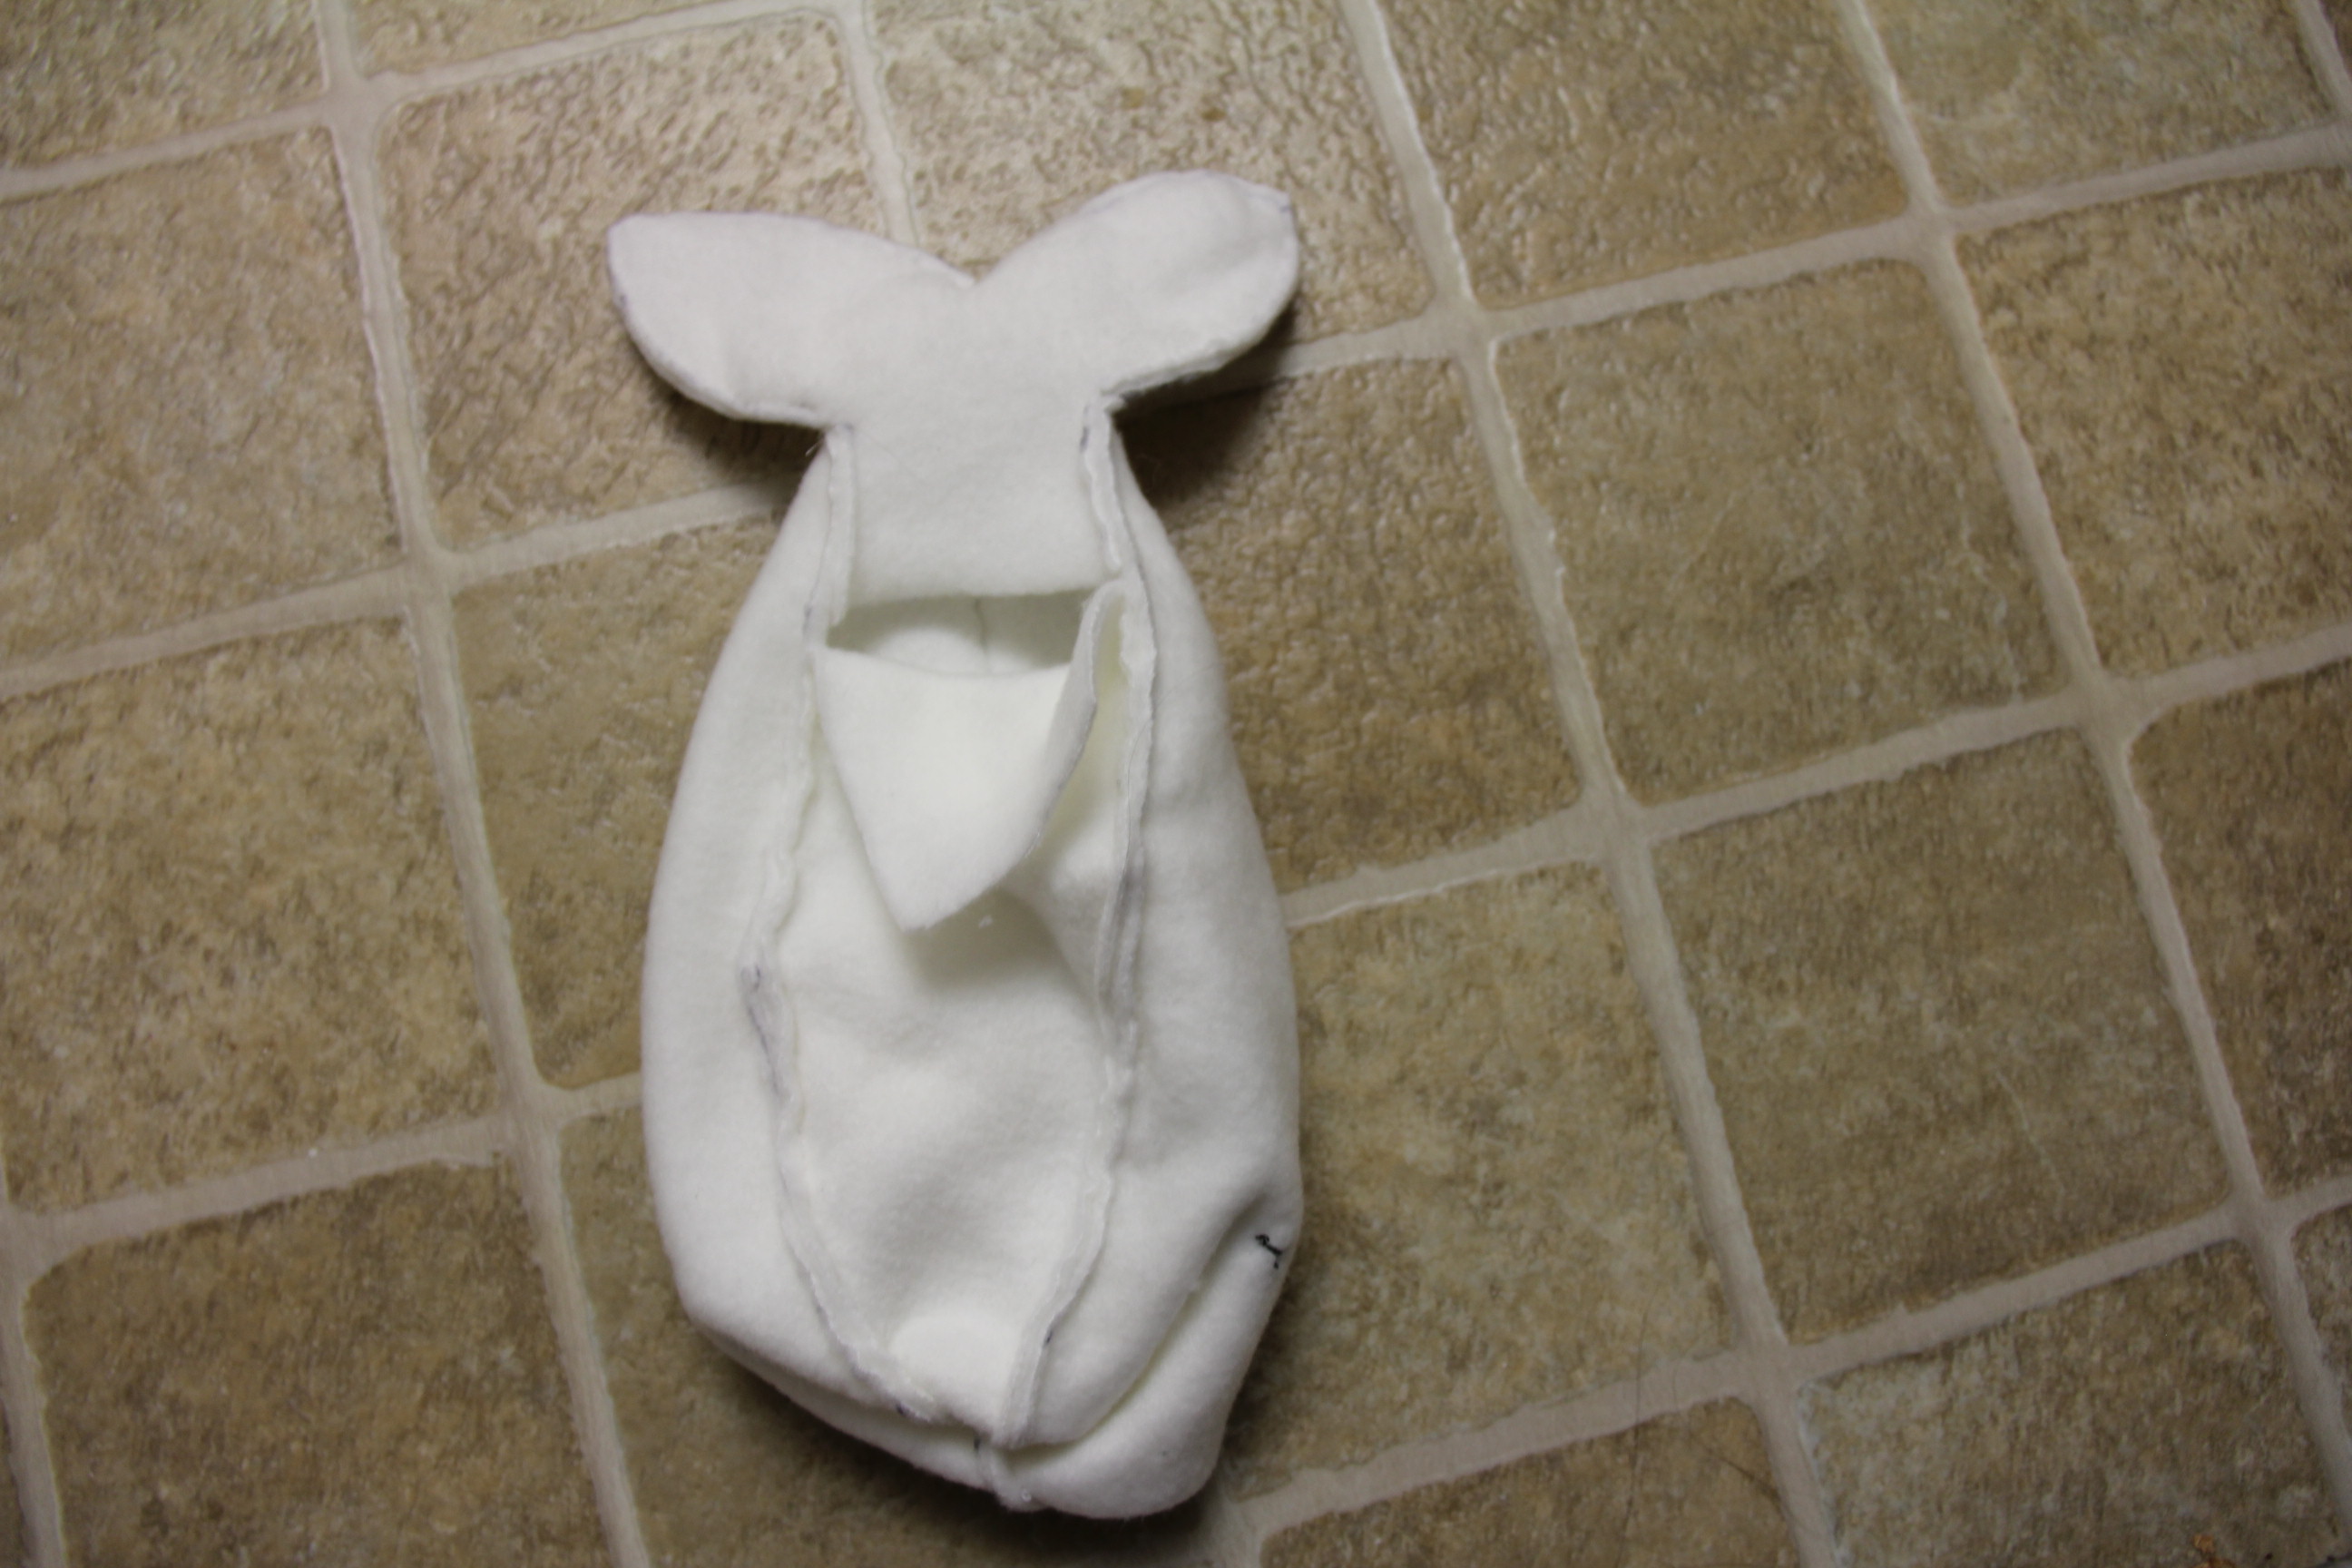
STEP NINE: My favorite step! This is when you flip the entire thing inside out through the open flap. Now stuff that bad boy with as much filling as possible. It’s really important that you make it as full as possible because that’s how you will really be able to see the shape of the animal once everything’s done. Stuff, stuff, stuff!!

STEP TEN: Sew together the open flap at the very end and…voila! You’re all done!

These make excellent gifts or snuggle buddies for little ones. Def give it a try and leave a picture of your creations!
[Thankful for] a loving boyfriend // a loving God // 18 months of adventures // technology that makes long distance easier // baby belugas // learning how to thread a needle // no pricked fingers // grace upon grace each morning // summer
As always, thankful that you stopped by! And here’s a lovely video about Baby Belugas as sung on Full House! Have a happy weekend 🙂
Juang

This is so cute! Do you mind if I add this to my Lovely Beluga Craft Pinterest board?
Absolutely, go for it! I’m glad you like it :))